Creating Replace Face Features | ||||
|
| |||
Modify Shapes
You can modify a shape by extruding one of its face up to an external surface.
The Replace Face Definition dialog box appears.
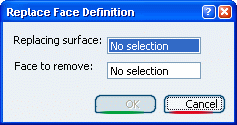
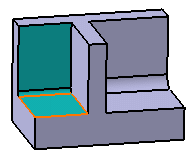
Select the yellow surface as the replacing surface.
Select the 3D shape's bottom face.
The face turns purple indicating that it will be replaced.
Click OK to confirm the operation.
The 3D shape has been reshaped and the new feature (identified as ReplaceFace.xxx) is added to the specification tree.
![]()
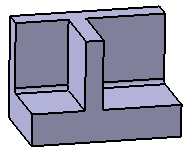
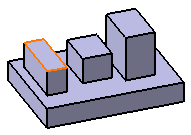
Replace Faces with Other Faces to Align Them
You can align a face with another face, which is sometimes a way of simplifying volumes, but also adjusts shapes prior to manufacturing operations
Click Replace Face
 .
.Select the horizontal face from the left pad.
Once selected, the face to be replaced is shown in purple.
Click OK to confirm the operation.
Both faces are aligned.
![]()
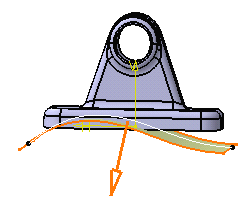
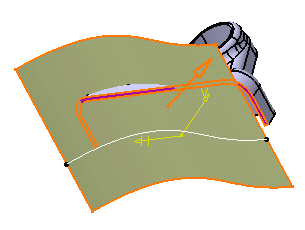
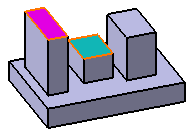
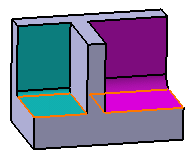
Replace Faces with Other Faces
You can replace a set of tangent faces with a set of other tangent faces.
Click Replace Face
.Select the horizontal face on the left.
This face, which is the replacing face is now displayed in blue. Because it is tangent to the face produced by a fillet operation, that face is also selected and in turn includes the vertical face. Three faces are then selected as indicated by the blue color.
Select the horizontal face on the right.
Three tangent faces are selected as the faces to be replaced and are shown in purple:
Click OK to confirm the operation.
The result you obtain shows that replacing these faces affects the fillet radius value to the left.