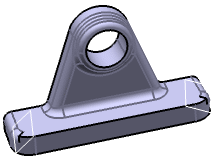
Creating Remove Face Features | ||||
|
| |||
Create a Remove Face feature
You can completely remove the particular face by selecting it from the 3D shape.
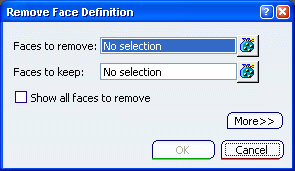
Click Remove Face
 in the Dress-Up Features toolbar (Remove/Replace Face
sub-toolbar) in the Part Design workbench.
in the Dress-Up Features toolbar (Remove/Replace Face
sub-toolbar) in the Part Design workbench.The Remove Face Definition dialog box appears.
Important: For the Generative Shape Design workbench, Click Remove Face  in the Operations toolbar (Trim-Split
sub-toolbar). The Remove Face Definition dialog box
is displayed as shown:
in the Operations toolbar (Trim-Split
sub-toolbar). The Remove Face Definition dialog box
is displayed as shown: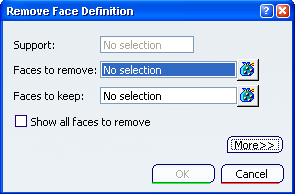
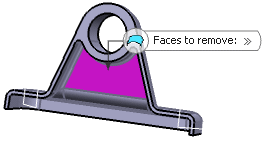
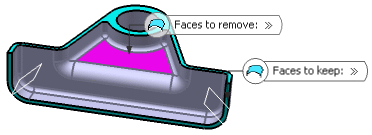
In the Faces to remove field, select the inner face as shown.
The face turns purple indicating that it will be removed.
Important: - In the Generative Shape Design workbench, the Support field is automatically filled in with the surface whose face belongs to. To modify the support, you need to remove all faces first.
- The contextual menu on the Faces to remove
field displays the following contextual commands:
- Clear Selection: removes all selected faces from the selection.
- Tangency Propagation: includes all faces tangent to the selected faces from the selection.
In the Faces to keep field, select both faces as shown.
The faces turn blue, indicating that they will not be removed.
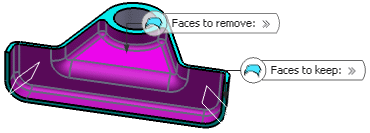
Select the Show all faces to remove option to preview all the faces adjacent to the purple face that will be removed.
Warning: In the Part Design workbench, faces to remove and faces to keep must belong to the same body while in the Generative Shape Design workbench, they must belong to the same support surface. If not, an error message is issued. Click OK to confirm.
All of the faces have been removed. The new feature identified as RemoveFace.XXX is added to the specification tree.
![]()
Create a Remove Face feature Using Limiting Elements
You can partially remove some faces using limiting elements. This particularly helps you to locally modify a fillet.
Click Remove Face
again and select the face as shown to remove it, in the Remove
Face Definition dialog box.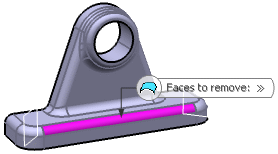
Click More>> to define limiting elements for the removal of the face.
The Remove Face Definition dialog box dialog box is expanded:
To determine a face to limit, right-click in the Faces to Limit field and select Create.
A new Faces to Limit dialog box appears.

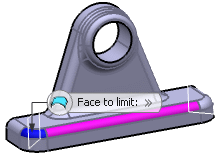
In the Face to limit field, select the face as shown.
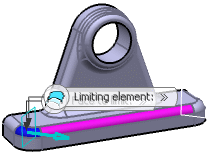
In the Limiting element field, select the plane as shown. The arrow indicates the side of the face to be removed.
Note: You can click Reverse Direction to reverse the direction of the face to be removed.
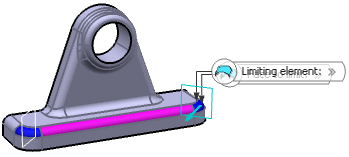
Important: The face to limit cannot be a removed face (use the Show all faces to Remove option to see what are the removed faces). Repeat step 3 to 5 to create another limiting face as shown.
Important: The contextual menu on the Faces to limit field displays the following contextual commands: - Reframe on: reframes the view on the created limiting face.
- Edit: edits the limiting face created.
- Remove: deletes the selected face to limit.
- Clear all: clears all the selections made.
Warning: - In this command, you can select only one face to limit.
- The face to limit can only be split once.
Click OK to confirm the second limiting element.
The face is partially removed up to the limiting elements depending on the defined direction. The new feature identified as RemoveFace.XXX is added to the specification tree.