Instantiating Power Copies Using Step by Step Instantiation | |||||
|
| ||||
Instantiate Power Copies
You can instantiate power copies using step by step instantiation once they have been created.
From the reference document, click Instantiate From Selection
 or select Insert > Instantiate From Selection... from the menu
bar.
or select Insert > Instantiate From Selection... from the menu
bar.Select the Step by step instantiation mode.
The Inputs field is grayed out.
Click OK.
A PowerCopy Instances node is automatically created in the specification tree of the current document. The Comparison Window opens on the right side of the screen and the Scan and Synchronization toolbars are launched.


The Power Copy instance feature stores several information:
- A link to the referenced Power Copy. This link will be later used to retrieve the referenced 3D shape and the inputs' geometry.
- The list of inputs to valuate in the current 3D shape as well as their role.
- The list of parameters published by the Power Copy during its creation.
- The mapping between referenced objects and instantiated objects.
You cannot delete the Power Copy instance feature as long as instantiated features inputs are not valuated. An error message is displayed if you do so. Deletion is possible only when instantiated features have all their inputs valuated, i.e. when the instantiation is completed, or when all instantiated features are deleted.
When editing a feature in the Comparison Window, the edited feature is highlighted simultaneously on both left and right sides of the screen, in specification trees and 3D areas.
Click First
 or First to update
 in the Scan toolbar to update the features instantiated by the power copy.
Warning: Only the Structure mode is available here. Each time the scan finds a feature that needs inputs, a dialog box is launched to valuate them. Only the necessary inputs are requested.
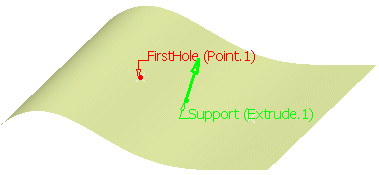
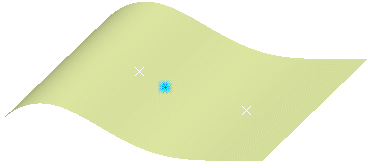
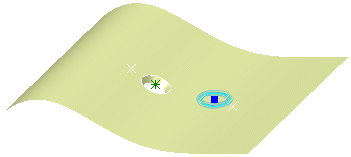
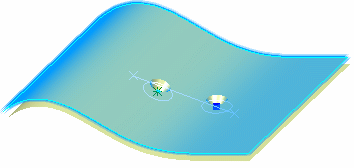
In our example, the circle is the first instantiated feature that need inputs:

Note that:
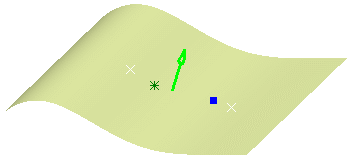
- The visualization is automatically synchronized on Circle.1 (in the right viewer). It lets you visualized the reference model with the exact display during the circle creation.
- Indicators are displayed in the right viewer to identify the previous inputs and each input is highlighted.
- After the inputs are selected, the scan command is still active.
You must select inputs in the order they appear in the dialog box.
Select the value for each input.
After each selection, an indicator is displayed in the left viewer, with orientation when necessary. Click on the green arrow to reverse orientation if needed.

Click OK.
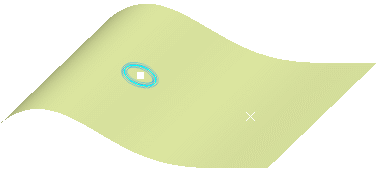
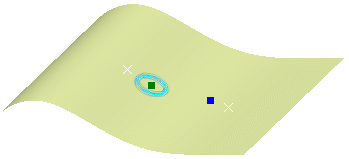
The circle is updated.
Click Next
 or
Play update
or
Play update
 to continue the inputs valuation.
Once the update is finished, close the Scan command as well as the Comparison Window.
Important: - The Scan command can be interrupted at any step if you need to create or modify a feature to valuate an input. You can do so while the Comparison window is still active: simply re-launch the Scan command once the creation or modification is done.
- The Power Copy instance feature that contains all the information is persistent. Therefore you can save the 3D shape before (or during) the Scan update, close your session, launch a new session and launch the Scan command again to valuate the inputs. Step by step instantiation is completed when all inputs are correctly selected.
- If you skip some steps (by direct selection in the tree during the Scan command or by using Last button for instance, you will still need to valuate the inputs of all intermediate steps and a warning message is issued. Indeed the Scan command stops as soon as a feature needs inputs valuation and this feature is then defined as the in work object, in order to prevent the selection of inputs which are below it.
- If the reference 3D shape is not found, the scan and the input valuation can be performed but the Comparison Window is not available and the old inputs (with reference orientation) cannot be displayed.

![]()
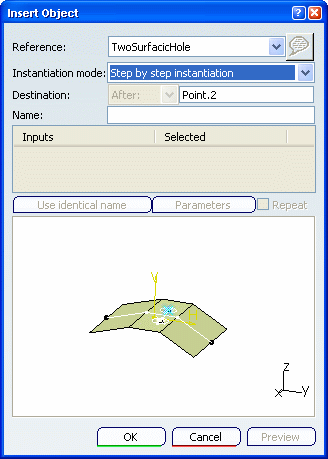
Instantiate Nested Power Copies
The nested power copies instantiation mode is only available providing the power copy to be created is ordered and the chosen destination (that is the current feature) respects ordering rules.
In this scenario, we are not going to select the point as input for the circle: indeed the center of the circle is to be created using another power copy.
From the reference document, click Instantiate From Selection
or select Insert > Instantiate From Selection... from the menu
bar.Click First
or First to update
in the Scan toolbar to update the features instantiated by the power copy.Click Instantiate From Selection
 or select Insert > Instantiate From Selection...
from the menu bar.
Select the Step by step instantiation mode.
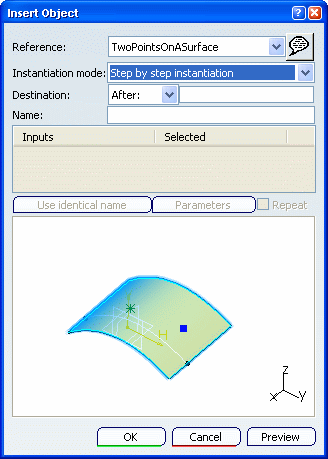
Click OK.
A new Comparison Window is created with the destination 3D shape on the left and the TwoPointOnASurface PowerCopy reference on the right. You can either work from this window or switch to the initial window containing the destination 3D shape.
The new instantiated features are inserted after the current one and the scan command is launched.

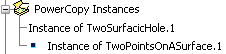
A new Power Copy instance is added under the PowerCopy Instances node:
Click First
or First to update
in the Scan toolbar to update the features instantiated by the Power
Copy.Warning: Only the Structure mode is available here. Each time the scan finds a feature that needs inputs, a dialog box is launched to valuate the inputs. Here a point is the first instantiated feature that needs an input.
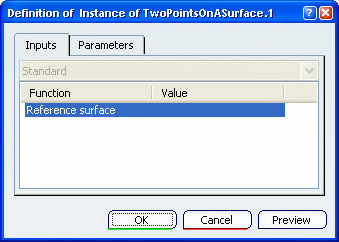
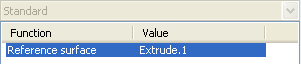
Select the value for the Reference surface and click OK.
After each selection, an indicator is displayed in the left viewer, with orientation when necessary. Click on the green arrow to reverse orientation if needed.
The point is updated.
The instantiation of TwoPointsOnASurface Power Copy is now completed. All instantiated features are updated and you may delete the Power Copy instance feature if desired. The corresponding Comparison Window can be closed.
Click Next
or
Play update
.
The next feature that needs inputs is the circle.
- As this feature belongs to the first instantiated Power Copy, the Comparison Window automatically changes to display the 3D shape containing the right Power Copy reference.
- Even if the previous Comparison Window (corresponding to the TwoPointsOnASurface Power Copy instance) has not been closed, the Comparison Window corresponding to the right Power Copy instance (TwoSurfacicHoles) appears in the right viewer.
- Indicators are displayed in the right viewer to identify the previous inputs and each input is highlighted.
Select the value for each input and click OK..
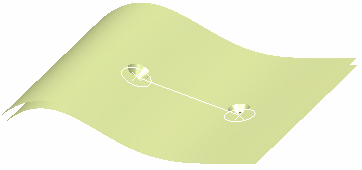
The first input can now be valuated with one of the two previously created features.
After each selection, an indicator is displayed in the left viewer, with orientation when necessary. Click on the green arrow to reverse orientation if needed.

The circle is updated.
Click Next
or
Play update .
An input is requested for the following feature, that is the circle.
Select the other created point and click OK.

The circle is now updated and all inputs of TwoSurfacicHoles are valuated.
Close the Comparison Window.
Tips: - If you launch
the Quick Select
command
 ,
either in the left or in the right window, the visualization is
updated in both windows: pre-highlighting is synchronous and a
color code indicates the current selection (green labels) in the
Quick Select dialog box and the parents/children (red labels).
,
either in the left or in the right window, the visualization is
updated in both windows: pre-highlighting is synchronous and a
color code indicates the current selection (green labels) in the
Quick Select dialog box and the parents/children (red labels). - Once all Power Copies have been instantiated, you can close the comparison windows that are still open and delete the Power Copy instance features.
- If you launch
the Quick Select
command
