From any Product: - Select .
A PPR context with an empty Machining Cell is created. An empty Activities Process Tree opens automatically.
- Create a generic machine or assign a machine from the database.
As soon as a machine is assigned to the Machining Cell, a Part Operation and a Manufacturing Program are created in the Activities Process Tree.
- Alternatively, open an existing Machining Process or PPR context .
 By default,
the
Activities Process Tree opens
automatically.
Click  Utilities. Utilities. Click
Creates rough stock
 in the Geometry Creation sub-toolbar.
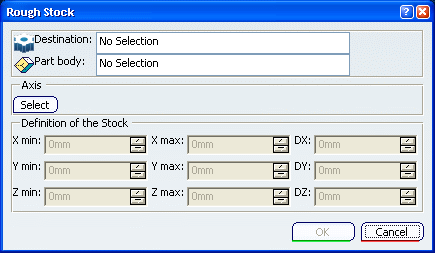
The Rough Stock dialog box is displayed:

Select the Destination, i.e. select the
body where the rough stock is to be created.
Pick the part on which the rough stock is to be created.
- The Part
body information is updated accordingly.
- A dialog box is updated with the minimum and maximum values that are
required in X, Y and Z to create
a box that would surround the part.
- The default box is displayed in bold
dark lines.
Modify the X,Y,Z values if required. Change the
axis system used to define the
rough stock: click Select and then choose either: - an axis in one of the other axis systems,
- a plane,
- or a planar surface.
Click OK to create the rough stock.
|