Open an existing or create a new CATIA 3D Part document. Double-click the 3D Part to switch to the Resource Definition and Layout workbench. Click
Create Template
.
The Create Template dialog box appears. Select the CATIA 3D part. Change the default name of the Template.
The Create Template dialog box is updated with this information.
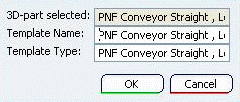
Click OK to create a template from the 3D Part, which gets persisted in the database as PLM Template. Note:
If Localization for the parameters is to be provided, you must do the following:
- The role of the parameter should contain only one string without white-spaces. Right-click on the parameters and modify the local name of the parameter, if required.
- The type of the template must be only one string without white-spaces.
- Create Nls and Rsc files with the type name of the Template.
- In the CATNls file, provide a list of Strings for the roles of the parameters with entries like:
- Length1="PadDepth";
- Length2="CircleRadius";
where Length1 Is the role of a parameter and PadDepth is your NLS name for this parameter.
- In the CATRsc file, provide one entry for the path of the 2D image to be used for the Template as follows:
<TemplateType>="resources\graphic\icons\MyPictureFile.jpg"; Where the right part is a path to a picture file in the runtime view (recognized formats are TIFF, BMP, JPEG, PNG, and RGB).
- Put both the Nls and Rsc files in the runtime view in the resources\msgcatalog directory.
|