Using Standard-Defined Styles | |||||
|
| ||||
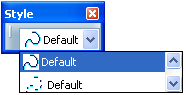
Start creating circles, for example. In the Style toolbar, the styles available for the type of element you are creating are displayed. In our example, two Default styles are available: one, the current style, is to be used for curves and the other one is to be used for construction curves.
Click to validate and end the circle creation.
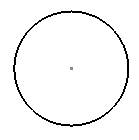
The circle is created with the selected style, as defined in the standard used by the drawing. (Consequently, you may obtain a different result than the one shown here.
Now, start creating a radius dimension for this circle.
Once again, the Style toolbar displays the styles available for radius dimensions. In our example, only one style is available, therefore it will be used by default (you don't need to select it).

In the Graphic Properties toolbar, select another color, red, for example.

In the Style toolbar, an asterisk appears in front of the selected style: this asterisk indicates that the style of the element you are creating has been overloaded compared to the style which is defined in the standards.
