Creating Equidistant Points | |||||||||
|
| ||||||||
Click Equidistant Points
 in the Profile toolbar (Point sub-toolbar).
You can select the line, the spline or the two points you want to add equidistant points between.
For the purpose of our scenario, select the line.
The Equidistant Point Definition dialog box appears. By default 10 equidistant New Points are previewed.
By default 10 equidistant New Points are previewed.
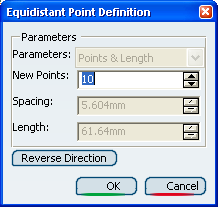
The Reverse Direction button allows you to create the equidistant points in a reverse direction.
Select one of the extremity points of the line as starting point.
The Parameters and Spacing fields automatically become editable. By default, the Points & Spacing parameter option is displayed.
Press Enter if needed. Two points are displayed and distributed along the line.
Press Enter if needed. The point distribution is modified.
Press Enter if needed. Three new points are now displayed, but the point distribution is not modified.

Click OK. The points are created with their constraints and associated formulas.
Tip: Constraints are similarly assigned to these points and distribution on the condition that you previously activated Dimensional Constraints  and Geometrical Constraints
 in the Sketch tools toolbar.