Defining Blocks | |||
| |||
Create Block
You can create a block in the current logic.
Click New Block
 and a logic element in the specification tree.
 The Block Properties dialog box appears.
Click OK.
Result for a Simulation Logic
Result for a State Logic Library
In the contextual menu of the block, do one of the following:
- Select [Block Name] object > Block Properties
- Double-click either the Ports, Signals or Instances nodes in the specification tree.
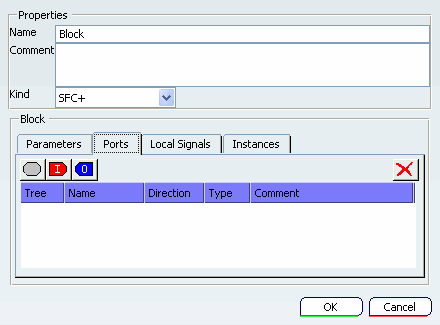
The Block Properties dialog box appears.
The Block Properties dialog box has two sections:
- Properties allows you to define the block name, its kind and a comment.
- Block allows you to define the components of the block: there are specific tabs for defining Parameters, Ports, Local Signals and Instances.
![]()
Define Block Properties
You can modify the default block name, add comments and select the block kind: SFC+ or Dataflow.
Select SFC+ from the Kind list.
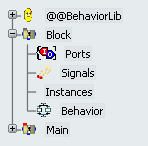
Scroll over the block in the specification tree.
The tool tip displays the signature and the comment of the block.

In the Kind list, select Dataflow.
A Warning box appears:
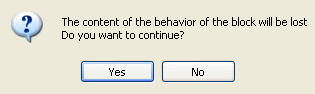
Click OK. The Behavior node is deleted and the block icon is modified.
![]()
Define Ports
You can define the block ports, constrain their type and direction.
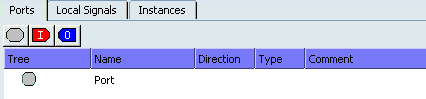
To define the name, type, direction, and comment of a new port, fill the port data as defined below:
- Fill the Comment column to add
a comment to this port.
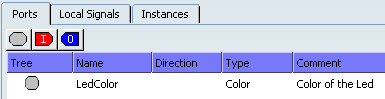
Note: The comment is displayed in the tool tip of the port. The tool tip appears when you move the mouse over the port in the tree or the Block editor.
- Fill the Comment column to add
a comment to this port.
Click Add Input
 to add a new port. A new port is created with a constrained direction.
Select the port and click Add Port
 twice. The port is converted to a structure, each new port is added
as a structure item.
twice. The port is converted to a structure, each new port is added
as a structure item.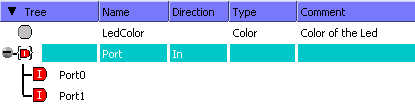
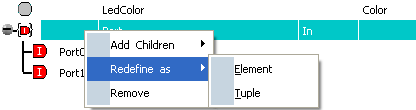
The items direction is determined by the direction set at the structure level. If no direction is defined at that level, the direction can be set individually at the item level.
The items names are defined in the Tree column. In the Name column, you can define their aliases.
If needed, you can redefine the structure using the contextual menu:
![]()
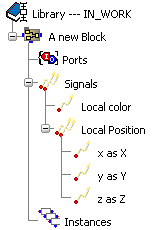
Define Local Signals
You can define the block local signals.
Click Add Signal
 .
.To define the name, type and comment of the new signal, fill the signal data as defined below:
- Fill the Comment column to add
a comment to this port.
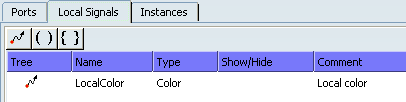
Note: The comment is displayed in the tool tip of the port. The tool tip appears when you move the mouse over the signal in the tree or the Block editor.
- Fill the Comment column to add
a comment to this port.
Click Add Structure
 to create a new structure and select it.
 Click Add Signal to add signals as defined below.
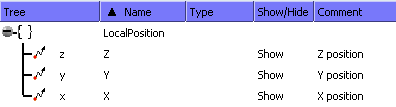
The name of the structure items are defined in the Tree column. In the Name column, you can define their alias.
Click OK. The block signals are defined.
![]()
Define Block Instances
You can define block instances to be run in the current block.
An instance is a block instantiated in the current block. For this task, a block must be already defined in the specification tree above the current block.
Click Add Block
 to add a block instance.
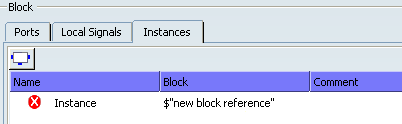
Change the instance name.
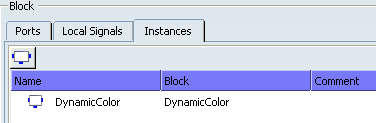
Click OK. The block instance is defined.
Note: Via this tab, you cannot create the block instance defined as parameter (see next section). The instance of a parameter has to be created in the Block Editor workbench.
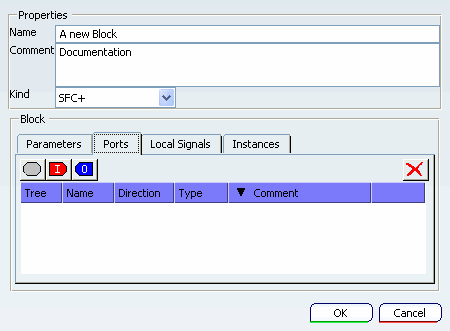
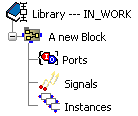
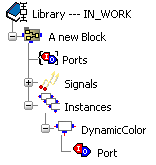
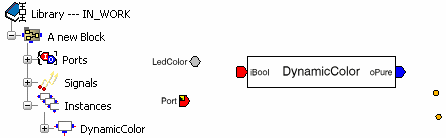
Double-click A new Block in the specification tree.
The Block Editor workbench is opened. You can check that all the elements defined in the Block Properties dialog box are visible in the editor.
![]()
Define Parameters
Parameters can be constants, functions or blocks to be used in the block behavior. Their difference with regular constants, functions or blocks is that they are parameters of the block and they can be redefined at each instantiation of this block.
These parameters are useful if the block behavior depends on its context. Thus, the block behavior can be modified for each instance.
Click the tab Parameters.
Click Add a block parameter
 .
.A new parameter is added to the list.
- Name: This is the only mandatory field.
- Default Value: You can enter the default implementation of the parameter. For constants, the easy way is to fill the value. For blocks and functions, you can enter the name of a block or a function already defined.
- Type: In this field, you can enter the constant type or the signatures of the functions and blocks.
- Comment: You can add a comment to any parameters.
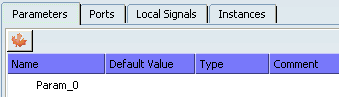
Double-click Param_0 to redefine the parameters name.
Tip: At this stage, you can click OK. The parameter is created. As no type or default value is defined, you need to instantiate the block to build it or to debug it. See below some typical examples of constant declarations.
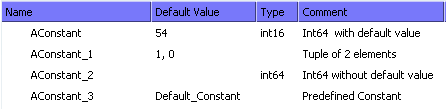
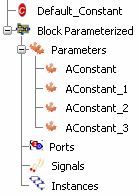
Note: Default_Constant is a predefined constant accessible in the scope of the block.
Click OK.
The defined parameters are available in the specification tree.
You can enter new parameters to create blocks and functions parameters. See below typical examples.
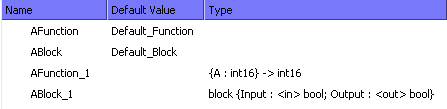
Note: Default_Function and Default_Block are a predefined function and a predefined block accessible in the scope of the block.
Tip: To define types of blocks and functions, refer to Logic Control Modeler Language > Signature
Once the parameters are defined, they can be used in the block behavior like any regular constants, functions or blocks.