Installing the Code on Windows | |||
| |||
Install the Files
This section explains how to install the files.
Note: instead of using the physical CD-ROMs, you can copy the contents of each CD-ROM into a separate folder for each CD-ROM, making sure that the name of each folder corresponds to the CD-ROM number and perform the installation from this location.
An installation log will be created in the installation directory in a file named:
Setup.log
Lines added to the beginning of the installation log will specify:
- whether you installed 32-bit or 64-bit code
- your Windows operating system
- and the product line.
Log on as an administrator.
You must belong to the Administrators group, or have the privileges assigned to the Administrators group. Otherwise, you will not be able to start the installation.
Insert the CD-ROM into the drive.
The following dialog box then appears before the installation (on the x86 platform) while installing the Dassault Systemes Software Prerequisites x86 (if not already installed):
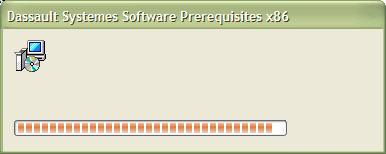
then a similar dialog box is displayed while Dassault Systemes Software VC9 Prerequisites x86 is being installed. Dassault Systemes Software Prerequisites x86 (or x64) contains the Microsoft Visual C++ Runtime files needed by the Dassault Systemes software.
Note that on a 64-bit platform, x86 is replaced by x86-x64. In the Add/Remove Programs control, the item Dassault Systemes Software Prerequisites x86 (or x86-x64) appears like this:

The setup program starts and the V6R2012 Welcome dialog box is then displayed on a background window.
Click the Next button to move to the next step.
Choose where you want to install the code.
The V6R2012 Choose Destination Location dialog box appears allowing you to specify the destination folder.
The default destination folder:
C:\Program Files\Dassault Systemes\B211is the same for all installations if you are installing:
- 32-bit code
- 64-bit code.
Note that the next level folder for 32-bit code is:
C:\Program Files\Dassault Systemes\B211\intel_abut if you are installing 64-bit code, the default destination folder is:
C:\Program Files\Dassault Systemes\B211\win_b64If the default destination folder is suitable, click the Next button to move to the next step, or click the Browse... button and navigate to select another folder and click OK.
The folder you choose must be empty. You can also specify a new folder: if the folder does not exist, you will be prompted to specify that you want the folder to be created, in which case you must click the Yes button to create the folder.
Installing Several Identical Releases in Different Locations on the Same Computer
Providing you have enough disk space, you can install several identical releases in different locations on the same computer.
For example, you may want to install the same GA release in two places. Your first installation could be, for example, the production version. Then, a second installation would become the test version, enabling you to test it before it becomes the official production version.
Furthermore, the different releases you can install can belong either to the same product line, or to different product lines.
To install another identical release, when you reach the Choose Destination Location dialog box, this time click the Browse... button, specify the new destination folder, then click OK. You will be prompted to create the folder if it does not already exist, so click Yes.
Click Next to display the V6R2012 Enter Identifier for your new Installation dialog box containing the following field allowing you to specify the identifier:

Enter an identifier which will enable you to identify all the components of your new installation. The string must contain uppercase characters or numbers, and must not exceed 20 characters.
The identifier for your new installation is preceded by an underscore and is visible:
- in the installation path
- in the environment name
- in the appropriate registry entries
- in the:
Start > All Programs > MyProductLine
menu, and new entries for the corresponding tools are created in the:
Start > All Programs >MyProductLine> Toolsmenu - in the Add/Remove Programs control.
If identical releases belonging to the same product line are installed, the OLE behavior is the same for both. However, if the installations involve different product lines, the OLE behavior registered for the last installation takes priority.
Click the Next button to move to the next step.
Choose where you want to create the runtime environment file.
The V6R2012 Choose Environment Location dialog box appears containing a field allowing you to specify the environment location:

A default destination folder is already proposed:
C:\Documents and Settings\All Users\Application Data\DassaultSystemes\CATEnv
If the default folder is suitable, click the Next button to move to the next step, or click the Browse... button and navigate to select another folder and click OK.
You can choose any folder, or specify a new folder: if the folder does not exist, you will be prompted to specify that you want the folder to be created, in which case you must click the Yes button to create the folder.
For more about environment files, refer to How Does an Installation Affect My Computer? Click the Next button to move to the next step.
Choose the setup type.
The V6R2012 Setup Type dialog box appears containing check buttons allowing you to choose the setup type:

This dialog box lets you specify whether you want to install all of the software on the CD-ROM, or select the configurations and/or products to be installed:
- Complete: specifies you want to install all the software, and moves
on to the next installation step (installation of online documentation
files) when you click Next.
Note that if you check the Complete option, Microsoft Visual Studio 2005 Tools for Applications (VSTA) will be installed if the prerequisite .NET Framework 3.5 SP1 is installed on your computer. If this prerequisite is present, the installation will continue, and the VSTA package will be installed silently before installing the other software products.
On 64-bit Windows, the program expdbgsetup.exe will be run silently to install Visual Studio Remote Debugger Light for x64.
If .NET Framework 3.5 SP1 is not installed, the installation will display the following error message:
Complete installation requires installation of .NET Framework 3.5 SP1
which is a prerequisite for VSTA installation
with an OK button. At this stage, you have only two choices: cancel the installation or check the Custom option to be able to continue. - Custom: lets you choose the configurations and/or products to be
installed.
If you choose this installation mode, you will be able to choose whether or not to install Microsoft Visual Studio 2005 Tools for Applications (VSTA).
- Complete: specifies you want to install all the software, and moves
on to the next installation step (installation of online documentation
files) when you click Next.
If you want to choose which configurations and/or products to install, check the Custom option and click the Next button to move to the next step.
The V6R2012 Install Language-Specific File and Fonts dialog box appears:
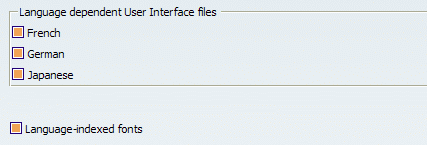
Check the buttons to install the user interface files for the appropriate language(s) and/or to install language-indexed fonts. Uncheck the buttons for the language files you do not want to install. This will let you skip the installation of unnecessary language files and fonts and enable you to save disk space.
If you intend to access data containing language-indexed fonts for a specific language environment, for example, drawing documents, if you have not installed the fonts beforehand, you will obtain a message when opening the document, saying that a font is missing and that it will be replaced by another font.
To avoid this problem, we recommend that you check the option to install the language-indexed fonts.
Note that the choice you make at installation is definitive: you cannot add or remove languages or fonts later when installing additional configurations and/or products.
Select the software you want to install in the Select Software and Select Extra Products dialog boxes successively.
In the Select Software dialog box, choose the appropriate configuration then the individual products you need, then click the Next button to access the Select Extra Products dialog box. This dialog box lets you choose the connectors to the required data sources.
For more information about the connectors, refer to the 3DLive topic in the online documentation for your brand. This topic contains the description of all the connectors.
When referring to the 3DLive topic, refer to the description of the connectors and ignore the MSI deployment aspects since they do not concern your brand.
Click the Next button to move to the next step.
If you checked the Custom installation option earlier, and if the software you selected to install requires it, the V6R2012 Optional VSTA Installation dialog box will prompt you to specify if you want to install Microsoft Visual Studio 2005 Tools for Applications (VSTA):

Two cases may occur at this stage:
- If .NET framework 3.5 SP1 is not installed, the check button will be unchecked by default, and if you check the button, the following message will be displayed in the dialog box:
.Net Framework 3.5 SP1 is resquired to isntall VSTA
Please cancel the installation and install .Net Framework Setup 3.5 SP1
and the Next button will be disabled. You will then have only two choices: cancel the installation or uncheck the check button.
If .NET framework 3.5 SP1 is installed, the check button will be checked by default. At this point, you can choose whether to install VSTA or not.
If you check the check button, the VSTA package will be installed silently before CAF installation. On Windows 64 the program expdbgsetup.exe will be run silently to install Visual Studio Remote Debugger Light for x64. The command run is: expdbgsetup.exe /C:"install.exe /q"
- If .NET framework 3.5 SP1 is not installed, the check button will be unchecked by default, and if you check the button, the following message will be displayed in the dialog box:
Check the button if you want to install the DS Video MJPEG Codec/Filter.
The V6R2012 Video MJPEG Codec/Filter installation dialog box looks contains a check button allowing you to specify that you want to install the codec/filter and/or Windows Media Video 9 VCM:

Click the Next button to move to the next step.
Set up the communication ports.
The V6R2012 Choose Communications Ports dialog box is displayed:

This allows you to set up on your computer:
- a port reserved for the communications backbone process
- a port reserved for starting the communications backbone process automatically
- a port reserved for processing events when using peripheral devices (spaceball, spacemouse, joystick)
By default, the "Set up communication ports" option is checked because it is strongly recommended.
A backbone daemon is created as a service and started. You can monitor the daemon by selecting
Start > Settings > Control Panel > Administrative Tools > Services.
The name of the service is
Backbone Service
The name of the executable program that corresponds to the backbone service is
CATSysDemon.exe
which you can track using the Task Manager.
This installation step adds three lines to a system file. For more information about the communications backbone and which file is concerned, refer to How Does an Installation Affect My Computer?. The installation setup then analyses the file in question. If the three lines are present (for example, due to a previous installation), the dialog box will not appear.
Furthermore, if the backbone service is already running, it is stopped then restarted. You can check which services are running by selecting:
Start > Control Panel > Administrative Tools > Services
Click the Next button to move to the next step.
Set up the data directories where required.
The V6R2012 Data Directories Selection dialog box appears:

Set the appropriate Java Home Path, then click the Next button to move to the next step.
Set up a startup icon on the desktop and entries in the Start menu.
The V6R2012 Custom Shortcut Creation dialog box appears:

This dialog box gives you the choice whether to create:
- a startup icon on the desktop
- a startup shortcut in the Start menu
- entries in the Start menu for the administration tools.
Not installing the desktop shortcuts allows you to minimize the number of registry entries during the installation.
Check the appropriate options.
Click the Next button to move to the next step.
Review your choices before installing the code.
The V6R2012 Start Copying Filesdialog box is displayed:
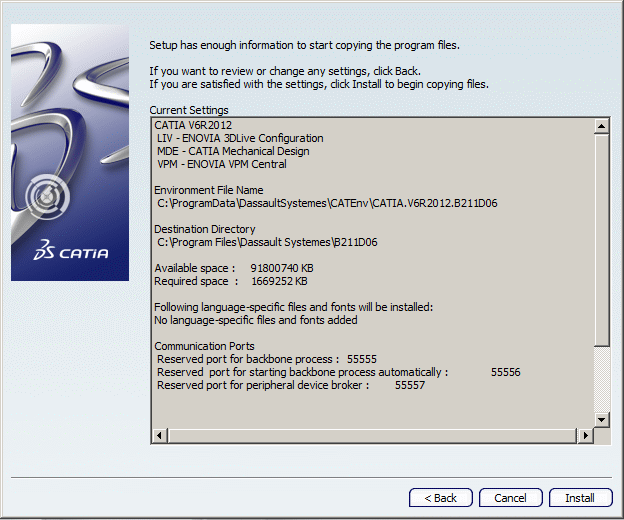
The central area lists the current choices you set in the previous steps (depending on which software you chose to install), for example:
- configuration and product names and documentation
- destination directory
- environment file name and location
- communication port configuration
- etc.
Click the Install button to start copying the files to your computer.
A progression indicator appears:
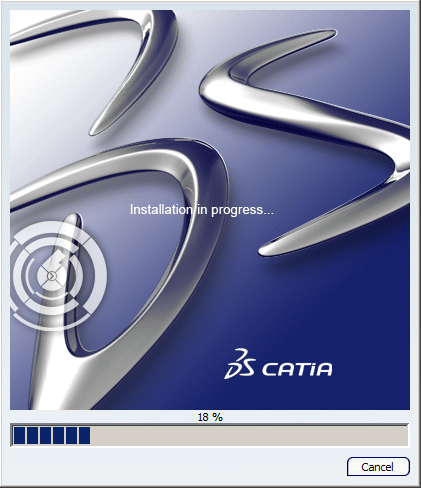
Finish the installation.
A dialog box informs you that the setup procedure has finished installing the software on your computer, and prompts you to launch your product now:
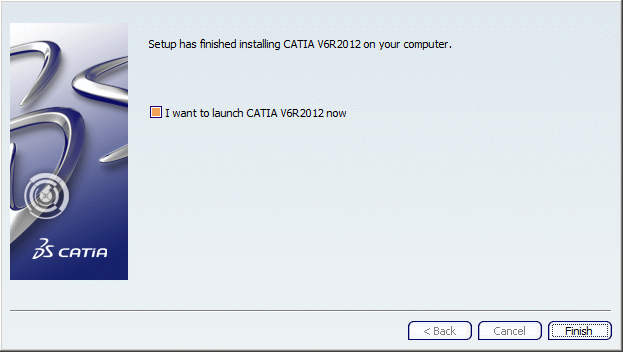
To do so, click the Finish button, or uncheck the check box if you do not want to start your product now.