Installing Hot Fixes | ||
| ||
Install a Hot Fix Using the GUI
This task explains how to install hot fixes using the GUI on Windows.
Log on as an administrator.
You must belong to the Administrators group, or have the privileges assigned to the Administrators group. Otherwise, you will not be able to start the installation.
Open a Command Prompt window, go to the installation folder.
The folder can be:
HFX_DESKTOP.Windows\1
HF_DESKTOP.Windows64
Run the command:
StartHFX.exe
The Welcome to Dassault Systemes Hot Fix Setup dialog box appears:
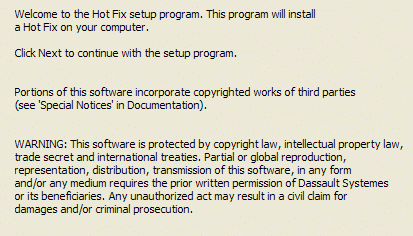
Click the Next button to move to the next step.
If any Dassault Systemes processes are still running, preventing correct hot fix setup, the setup program detects them and prompts you to terminate them. If so, click the Yes button to terminate the processes and continue.
Note that if you installed the same GA release in more than one location, you will be prompted to select from a list the destination folder to which you want to apply the hot fix.
This also means that you must perform a separate hot fix installation, each time selecting the appropriate destination folder for each GA. Installing the hot fix just once in one destination folder is not sufficient.
The Choose the Hot Fix Installation Mode dialog box then appears:

The dialog box specifies:
- the hot fix level
- the build number.
Check the Commit the Hot Fix automatically option if you want to commit the hot fix.
Installing a hot fix also involves committing or rolling back a hot fix. For more information, refer to Hot Fix Concepts.
During the installation, you can choose to commit the hot fix automatically. This is useful when you want to save disk space.
Click the Next button to move to the next step.
The Start Copying Hot Fix Files dialog box is displayed:
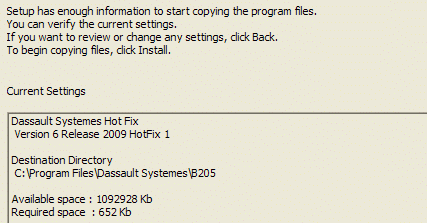
Click the Install button to install the hot fix.
A setup progression bar appears during the installation.
At the end of the installation, the End of Hot Fix Setup dialog box appears:
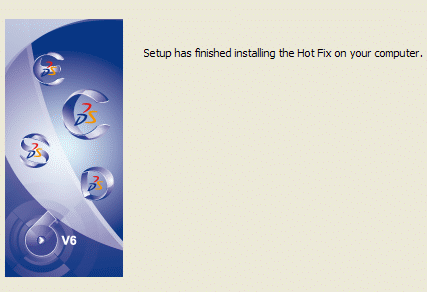
Click the Finish button once the setup phase is complete.
Installation Log
An installation log will be updated in the installation directory in a file named:
Setup.log
Lines added to the beginning of the installation log will specify:
-
whether you installed 32-bit or 64-bit code
-
your Windows operating system
-
and the product line.
![]()
Install a Hot Fix in Batch Mode
This task explains how to install hot fixes in batch mode on Windows.
You can also install a hot fix in batch mode using the StartHFXB command.
Log on as an administrator.
You must belong to the Administrators group, or have the privileges assigned to the Administrators group. Otherwise, you will not be able to start the installation.
Open a Command Prompt window and go to the appropriate directory:
HF_DESKTOP.Windows\1
HF_DESKTOP.Windows64\1
Enter the command:
StartHFXB
The syntax of the command is as follows:
StartHFXB [-u] [-b] [-bC] [-v] [-killprocess] [-h]
Parameter Description -u unloaddir Specifies the unload directory. -b Installs the hot fix (-b is optional) but does not commit the hot fix. -bC Installs in batch mode and automatically commits the hot fix. -v Verbose mode -killprocess Detects running processes in the installation folder (unload_dir\code\bin) and terminates them before installing the hot fix -h Displays help (optional).
![]()
Commit and Roll Back Hot Fixes
This task explains how to commit and roll back hot fixes on Windows.
Log on as an administrator.
You must belong to the Administrators group, or have the privileges assigned to the Administrators group. Otherwise, you will not be able to start the installation.
Select the Start > All Programs > MyProduct > Tools > Software Management V6R2012 command, or run the program:
install_root\code\bin\CATSoftwareMgt.exe
where "install_root" is the name of your installation folder which is, by default:
C:\Program Files\Dassault Systemes\B211\intel_a
(32-bit code on Windows XP Pro, Windows Server 2003, Windows Vista)
C:\Program Files\Dassault Systemes\B211\win_b64
(64-bit code on Windows XP Professional x64 Edition, Windows Vista)
The Dassault Systemes Software Management dialog box is displayed, and the General tab is open allowing you to identify the build level of software on your computer:
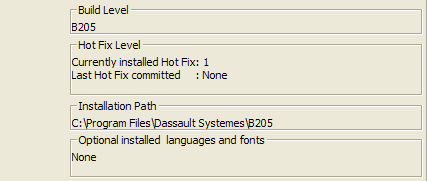
Click the Hot Fix Management tab.
If no hot fixes are installed, the tab will inform you that no hot fixes are installed.
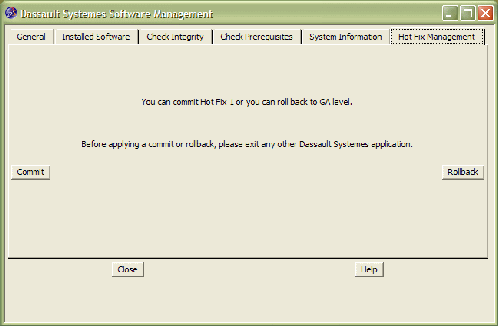
However, if a hot fix is detected, the tab will inform you exactly what you can do. For example, the following tab informs you that "Hot Fix 1" has been installed after a GA installation:
Depending on the results of your validation, you may decide to commit the hot fix, or roll back to the previous level.
Click the Commit button to commit the hot fix, or the Rollback button to uninstall the hot fix and restore the previous level.
![]()
Commit or Roll Back Hot Fixes in Batch Mode
You can also commit and rollback hot fixes in batch mode using the CATSoftwareMgtB command.
Enter the following command :
C:\Program Files\Dassault Systemes\B211\intel_a\code\bin\CATSoftwareMgtB
C:\Program Files\Dassault Systemes\B211\win_b64\code\bin\CATSoftwareMgtB
Use the appropriate parameters.
Examples on WindowsParameter Description -L Lists installed configurations and/or products. -I -I1 -I2 -I3 -I: checks integrity
-I1: Checks integrity - Level 1 only control files are checked; quickest
-I2: Checks integrity - Level 2 checks existence of all installed files
-I3: Checks integrity - Level 3 checks existence and validity of all installed files; this may take several minutes.
-P Checks prerequisites. -D Dumps system information to the output log file. -C Commits the hot fix. -R Rolls back the hot fix. -killprocess Detects running processes in the installation folder and prompts you to kill them. Do not forget to restart the processes afterwards. -o Sets the name of the output logfile. If you do not specify the -o option, the output will be displayed on the screen. -h Displays help (optional). C:\Program Files\Dassault Systemes\B211\intel_acode\bin\CATSoftwareMgtB -CC:\Program Files\Dassault Systemes\B211\intel_a\code\bin\CATSoftwareMgtB -R
