Defining the Working Zone | |||||
|
| ||||
Click Working Zone Definition
 .
.Tip: You can also access this command by pressing ALT+SHIFT+V. Click the surface.
A Tools Palette is displayed:
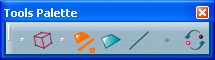
The following icons let you:
-


 :
select elements
:
select elements -
 :
inverse the selection
:
inverse the selection
-
Select one or more elements using the Ctrl or Shift key.

Click Selection Inversion
to swap the selection of the selected elements.All protected elements become unprotected and vice-versa.
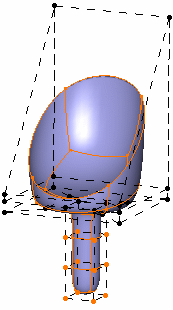
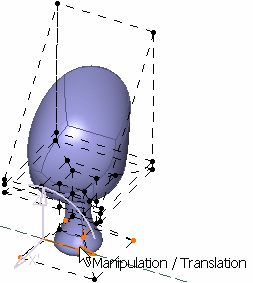
Click Modification
 .
.Previously selected elements are displayed and protected ones are hidden so that they cannot be selected. You can now work within a limited zone.
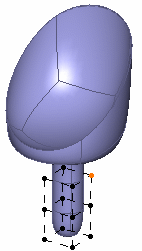
Deform the surface using the Transformation icons.
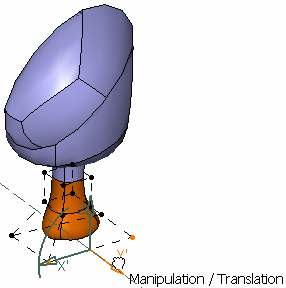
Click Working Zone Activation/Deactivation
 in the Tools Palette to reset the protection of selected elements.
All cells are displayed and can be modified.
Important: - The Working Zone Activation/Deactivation
icon only appears in the Tools Palette of the current command when
the Working Zone Definition
icon has been selected first. It is active by default. Click it to
deactivate the working zone.
- A protected face is a face with at least one protected vertex.
- A protected edge is an edge with at least one protected vertex.
Tip: The working zone is only active during the session for each subdivision surface. Therefore, when you close a model and reopen it, all cells are visible again. - The Working Zone Activation/Deactivation