Modifying a Dimension System | |||||||
|
| ||||||
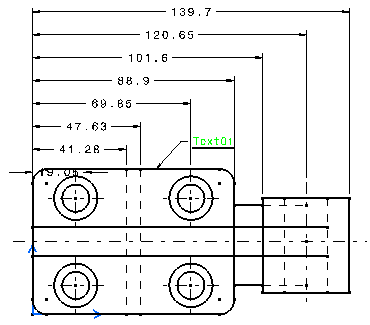
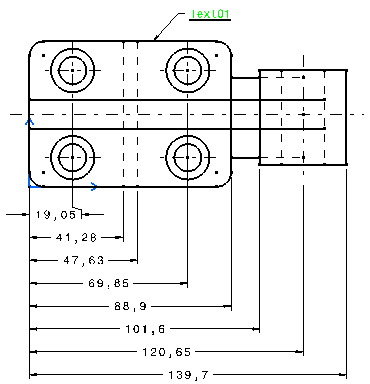
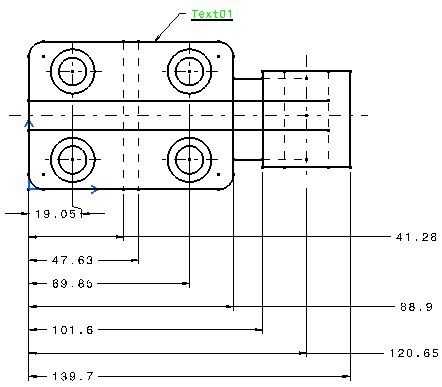
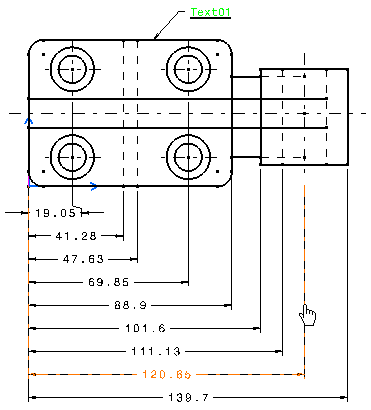
Moving a Dimension System
You can move and organize the dimension system.
Click over the dimension system to select it.
The whole system is highlighted.
Drag the whole system below the drawing.
![]()
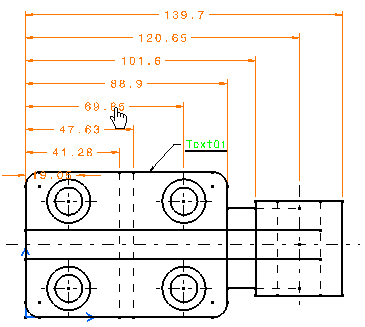
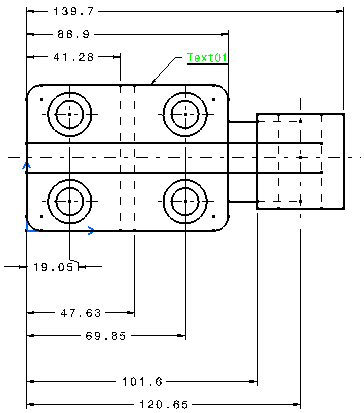
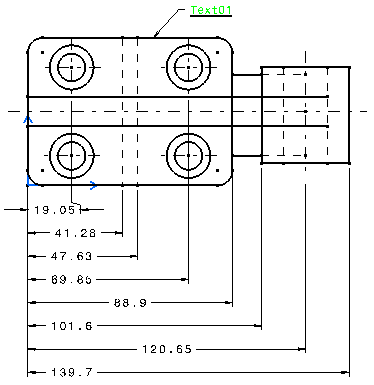
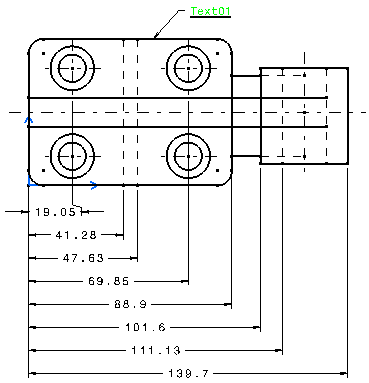
Moving a Dimension
You can move and organize the dimension lines.
In the Tools toolbar, click Dimensions system selection mode
 to deactivate the dimension system.
Click in the free space to end the dimension selection.
Important: Moving a dimension can be performed only on stacked dimension system.
![]()
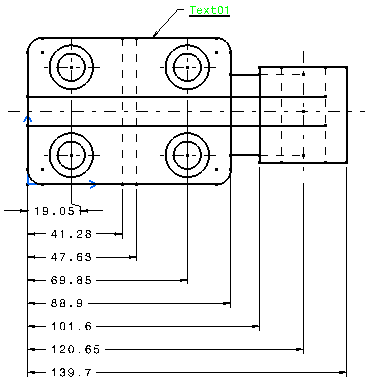
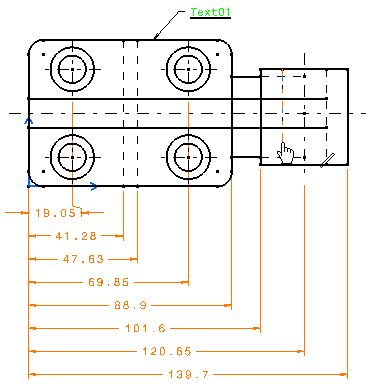
Aligning a Dimension System
You can align the dimension or a dimension system on to another dimension in the same view.
Make sure Dimensions system selection mode
is activated in the Tools toolbar.Right-click and select Align into System
 .
.
The dimensions are aligned into the system as before.
Important:
You can
perform an Align into System on a whole system as well
on several dimensions after multi-selecting them. To do so, set
the system's offset mode to free (see
System Tab), then click the Dimensions system
selection mode icon
 |
![]()
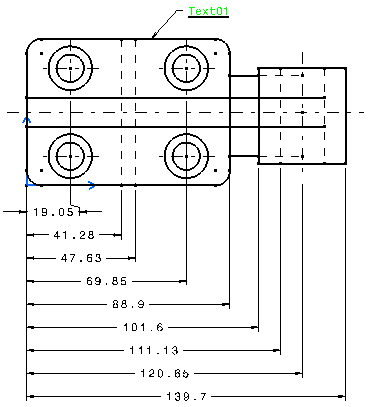
Restoring a Value Position
You can restore the value position of the dimension after it is modified.
Make sure Dimensions system selection mode
is activated in the Tools toolbar.In the System tab, set the Dimension values alignment at 10mm from the Reference line.

Click Apply to visualize the Dimension values alignment.
Click the Dimensions system selection mode
to deactivate the dimension system.Move some of the dimensions.
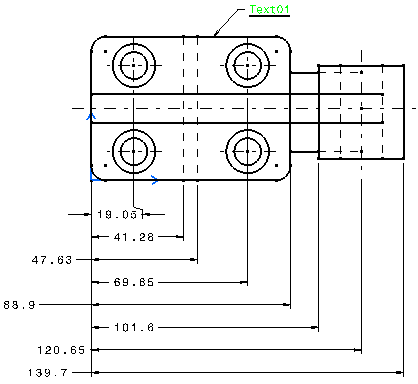
Click the Dimensions system selection mode
to activate the dimension system again.Right-click the dimension system and select Restore Value Position. The dimensions' values are back to their initial position.
Click the Dimensions system selection mode
to deactivate the dimension system.Drag several dimension values to modify their position.
Right-click and select Restore Value Position in the contextual menu. The dimensions' values are centered back in the system.
![]()
Adding a Dimension into a System
You have to select the icon corresponding to create the dimension system you would like to modify i.e. a chained, cumulated or stacked dimension system.
Make sure Dimensions system selection mode
is activated in the Tools toolbar.Select the geometry to dimension.
The new dimension is inserted into the system and is automatically aligned into the system.
![]()
Deleting a Dimension from a System
You can delete a dimension or a dimension system from your view or drawing.
Make sure Dimensions system selection mode
is deactivated in the Tools toolbar.Select a dimension. Note that only the selected dimension is highlighted, not the whole system.
Press Del key.
The dimension system is updated accordingly automatically aligned.
| Important:
Should
you want to delete the whole dimension system, make sure Dimensions
system selection mode
|
![]()
Copying a Dimension System
You can copy a geometry and its dimension system in to another view.
Make sure Dimensions system selection mode
is activated in the Tools toolbar.
Important:
If the dimension
system offset mode is set to Free, modifying one or several
dimensions of the system will not impact the system 's alignment.
If the dimension system offset mode is set to Constant,
an automatic line-up is applied to dimension lines and values in
case you perform any of the following action:
|