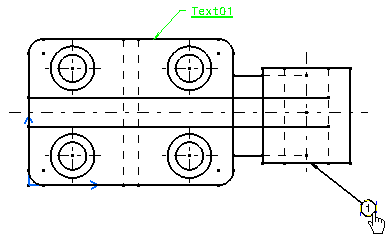
Creating a Balloon | |||||
|
| ||||
Click Balloon
 in the Annotations toolbar (Table and Balloon sub-toolbar).
Note: You can create balloons according to the number of reports available in the representation (drawing or a layout). A bill of material is a specific report. Therefore, you can create balloons referencing the report items. If the representation contains:
- No report: Balloon's text is pre-valued with an automatic numbering. This number is automatically incremented each time a balloon is created with a numerical value. If you overload this value with another number, the next pre-entered value will be the previous value incremented by one. In any case, this number is reset to 1 for each session.
- One report: By default, balloon's text is pre-valued with a reference to an item of this report if the selected geometry corresponds to a reported item. Otherwise, it is pre-valued with an automatic numbering.
- Several reports: Balloon's text is pre-valued with a reference to a reported item if one report is selected and the selected geometry allows it. Otherwise, it is pre-valued with an automatic numbering.
Note that, in all these cases, you can modify the pre-value during the creation. You can also create positional links between balloons and:
- Generative edges or 2D elements in Drafting workbench.
- 3D edges of the 3D part which contains the layout or 2D elements in 2D Layout for 3D Design workbench.
Select report.
If there is more than one reports available, you need to select the report you want to reference.
Note: You can change the active sheet during the command only to select a report. The sheet which is active when the command starts is memorized and the balloon will be created in this sheet. Only reports can be selected in other sheets. As soon as the report is selected, the active sheet reverts to the memorized sheet.
Select geometry.
If there is no report available or only one report available, you can select geometry or indicate the leader anchor point.
Important: If the geometry selection and the report selection are not consistent, it is not possible to create a balloon with a reference to the report. In this case, the created balloon will be valued with an automatic numbering. Click to define the balloon anchor point.
An immersive balloon creation dialog box appears, with the value pre-entered in the field and simultaneously previewed on the drawing or layout.

Note: The value of this balloon is automatically incremented when creating several balloons. Also, several balloons can reference the same reported item.
Optional: Enter another string or value as needed.
You can add some string, remove the attribute link or select a report. If a report is selected, balloon's text is completely replaced by a new attribute link to the item of the selected report.
Click
 .
.The balloon is created.

Notes:
- A balloon can be used to reference a reported item. To achieve this, an attribute link to the first column's attribute of the reported item is inserted instead of the balloon's text.
- A balloon can reference a report only if the geometry to annotate allows it. Consider the following:
- Geometry type is consistent: generative edges in Drafting workbench and edges or faces in 2D Layout for 3D Design workbench.
- Geometry corresponds to a report item.