Creating a Weld | |||
| |||
Click Weld
 in the Annotations toolbar.
Note: By default this command is not available in the Annotations toolbar. However, you can obtain it by customizing the toolbar. Refer Infrastructure User's Guide: Customizing for more information.
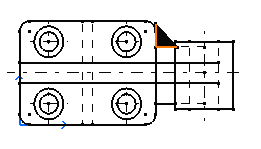
Select a second element. For example, another line. The default weld automatically appears on the drawing.
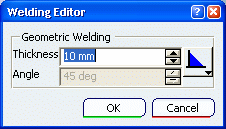
The Welding Editor dialog box appears.
If needed, modify the weld. For example, modify the thickness from ten to five millimeters.
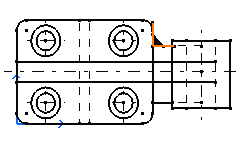
Click OK. The weld is created.
Important:
|