Creating Bumped Elements | |||
| |||
Click Bump
 in the Advanced Surfaces toolbar.
The Bump Deformation Definition dialog box appears.
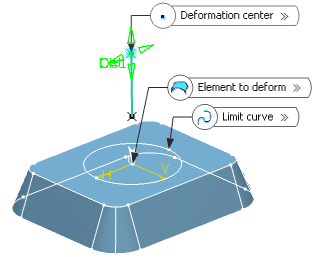
In the Element to deform box, select the curve or the surface to be deformed.
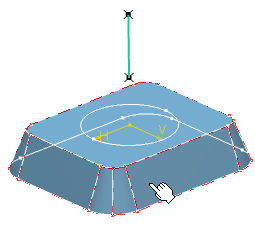
In the Limit curve box, select the limiting curve to delimit the deformation area.
The limit curve needs to be lying on the element to be deformed.
Tip: If not, use the Create Projection contextual menu on the Limit curve box to project the limit curve on the element. 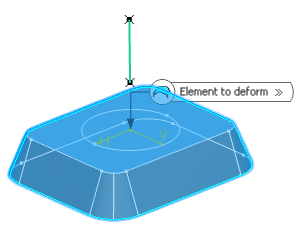
In the Deformation center box, select the point representing the center of the deformation.
The deviation will be maximum at this point, and evolve towards the limit curve, where it should reach 0.

In the Deformation direction box, select the curve indicating the deformation direction.
The deformation is propagated along this direction. By default, the deformation direction is normal to the deformed element.
Click Add Parameters>> to display further options:
You can:
- Define the continuity to be kept between the deformed area and the surface outside the deformation area (point, tangent, or curvature continuity).
- Specify a projection direction if the deformation center does not lie within the selected element to be deformed, so that it is projected onto it.
- Define a center curvature value to
control the shape of the bump deformation.
If the value is:
- Equal to 1 (case A), the shape is the default one (as if no value was defined)
- Smaller than 1 (case B), the shape is flatter
- Bigger than 1 (case C), the shape is steeper.
Note: All values are allowed (positive, null, and negative values), however it is advised to define a value comprised between -1 and 5.
Important: In case of curvature continuity, the original continuity between the deformed area and the surface outside the deformation area will be at best kept but may be approximate in certain cases. Click OK to validate the element deformation.
The element (identified as Bump.xxx) is added to the specification tree.