Creating an Assembly Symmetry of Fasteners | |||
| |||
Click Symmetry of fasteners
 .
.
The Symmetric Reference Creation dialog box appears.

Select the product to make symmetric either in the specification tree of the current assembly or click
 to browse it.
Optional: Click
 to create an assembly symmetry and swap to the Assembly Symmetry
workbench.
to create an assembly symmetry and swap to the Assembly Symmetry
workbench.
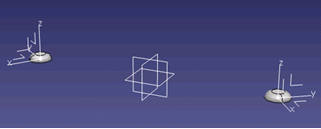
This workbench offers a simple way to define the symmetry of an assembly using two windows as shown below:

Through a dedicated set of commands, it allows you to choose the specifications of the symmetry for each object under the original product.
Note: Most fasteners are symmetrical according to their axis which means that the symmetry of a spot fastener has the same 3D geometry as its original fastener. Therefore default specifications may not be the appropriate.
Click OK.
The new symmetric product is created as a new reference and contains either:
- a new fastener engineering connection and a new fastener instance with a new fastener reference if the symmetrical fastener is different from the original one
- a new fastener engineering connection and a new fastener instance with the same fastener reference if the symmetrical fastener is the same as the original one
Here is an example with a single spot:
The below snapshot shows the product structure created by the Assembly Symmetry, i.e.:
- the symmetrical original product
- the symmetrical spot fastener instance and its associated engineering connection
- the symmetry specifications
- the additional enginnering connections (that insure the symmetrical position between the objects)


For further information about this functionality, refer to Assembly Design : Assembly Symmetry.