Creating a Cavity Extraction

You can create a cavity extraction feature placed into a new body, and referencing an existing body (the source Body). The cavity feature creates a protected volume.

The cavity extraction feature produces geometry useful in defining a cavity plate for molding the source Body. The output is associative, meaning if the source Body changes, the cavity extraction geometry will automatically change.

The output geometry includes the cavity, added, and protected volumes, as well as the unshelled portions of the shellable volumes. Features can be excluded, and an optional extraction properties feature can be used to omit protected volumes.

  1. Click Cavity Extraction .

    The Extract Cavity dialog box appears.


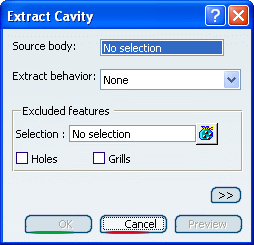
  2. Select Body.1 as the source body.


  3. Click the Extract behavior drop-down list and select Extraction Properties.1.

  4. Click OK to confirm.


  5. Click External Feature .

  6. Select Sketch.7 as the Profile/Surface.

  7. Click the Reverse direction button.

  8. Set the First Length to 100.


  9. Click OK to confirm.

  10. Right-click Body.1 and select Hide/Show.

  11. Right-click PartBody and select Hide/Show.


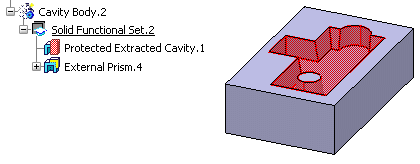
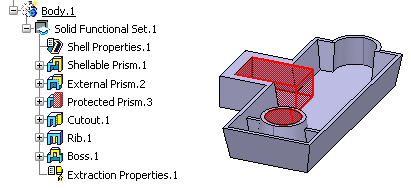
    Important: When you create a Cavity Extraction selecting a Body as Source body on a product which has multiple added/removed bodies or assembled bodies, the extraction will be generated on the Body (in this case, Solid Functional Set.1) in the first position of the selected Body.