Placing Electrical Devices | |||||
|
| ||||
Click Manage Links
 or select Tools > Manage Links... to display the list of
external devices to be placed.
or select Tools > Manage Links... to display the list of
external devices to be placed.The External Device List appears.
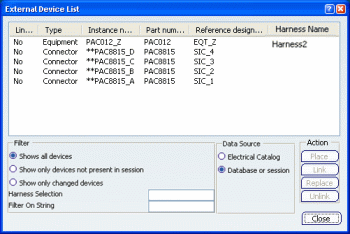
You can place:
- Equipments
- Connectors
- Splices
- Shells
To sort Electrical device lists:
- Click Harness name: this column displays the Harness name of each device assembly.
- If the parent device contains sub-devices linked to the same geometry, the name of this geometry is displayed as the name of the parent device.
- If the parent device contains sub-devices linked to different geometries, the label Several Harnesses appears in the Harness name column and the geometries are displayed where the conflict occurs.

- Enter a string of characters in the Harness selection
field to filter a specific Harness name (i.e. Harness2) and press
Enter.
If a specific Harness name is chosen, only the devices of this harness are displayed.
Only the devices linked to the same harness name string will be displayed.
By default, the field is empty and all devices are displayed.
The Harness selection is kept between two launches of the command.
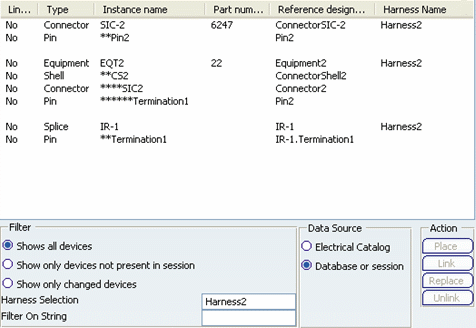
Both filters can be used at the same time and also with the assembly sorting through column selection.
- Click Harness name: this column displays the Harness name of each device assembly.
To retrieve the device from the database, do the following:
You can also retrieve the device from a catalog. To do so, make sure that a dedicated catalog exists, then:
- Click Place.
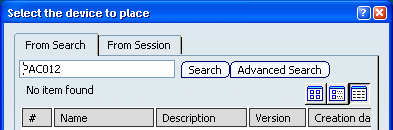
The Select Devicedialog box opens, ready to launch a query in the database on the device part number:
You can also retrieve the device from a catalog. To do so, make sure that a dedicated catalog exists, then:
Note:
- If no default catalog has been set, click More.. and search for a catalog.
- In the case of assemblies, you must individually select and position all constituent components.
- Click Place.
Place the equipment:
There are three ways to place devices. You can:
- Select an existing electrical device in the geometry area. The device is positioned and the two devices are automatically connected.
- Select a mechanical 3D shape and position using the Robot. See the Using the Robot section of the Infrastructure User's Guide.
- Press Ctrl and click anywhere in the geometry area to place the equipment at the document origin.
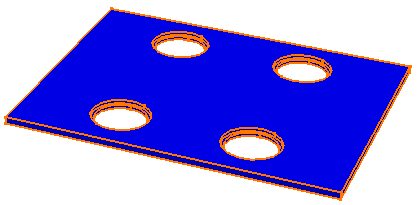
In our example, the equipment is positioned at the document origin:
Note: The equipment is an assembly that also comprises four connectors. The assembly is only considered fully placed when all four connectors have been placed.

Assemble associated connectors:
- In the External Device List, select each of the four connectors in turn.
- Search for and select the corresponding database connector.
Connectors are automatically placed in the equipment.
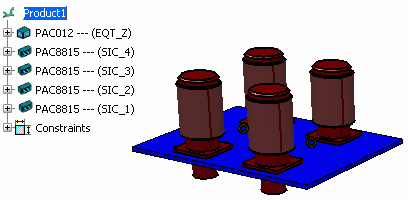
Note: Because information concerning the assembly is contained in the external system, once the corresponding connector is selected from the database, it is automatically positioned in the assembly.
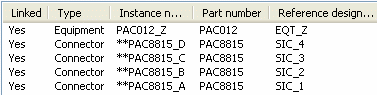
The external device list is updated: the equipment and connectors are now shown as linked.