Routing Branches on Floating Point

You can update a 3D point that links geometrically two branches together. This point is called: floating point. Its coordinates will be recomputed using the route of the two selected branches.

There are two ways of repositioning the floating point, either by keeping the same ratio as in the selected branches route or by choosing the Exact Length on the curve. The floating point allows changes in the branch route to obtain a more realistic view.

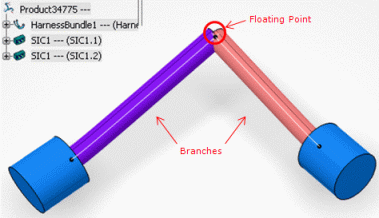
  1. Open a product with a floating point (3D point) and two branches connected through the floating point.

  2. Select the floating point and the two branches.

  3. Select Tools > Branch Management > Floating Point in order to choose how the floating point's 3D coordinates will be recomputed: using Ratio or Length..

    The Select mode dialog box appears:

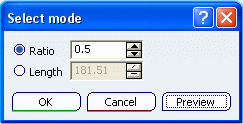
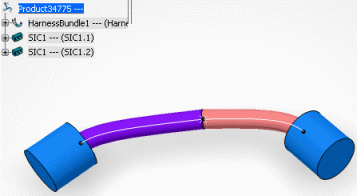
  4. Select Ratio and click OK.

    With this mode, the position of the floating point is repositioned using its previous position on the selected branches (route points). The floating point is changed into a 3D Point Coordinate.

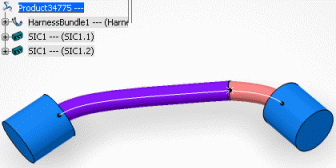
  5. Or select Length and click OK. You will see:

    With this mode, the length of the original curve is chosen.

    Note: The selected branches can be in two different electrical branch geometries. After executing the command, all the specifications of the branches are kept (tangents, profiles, …), only the position of the point is modified.

  6. Edit the floating point.

    Important:
    • Only editable objects can be selected for the floating point and the branches. The floating point can be linked to more than two branches. Once the point is modified, the connected branches need to be updated. There will also be modified. If at least one connected branch is not editable, the command is cancelled.
    • Both selected branches must be geometrically linked. A floating point cannot be repositioned on the basis of branches which have distant links together.