Generating a Track Along an Edge or Curve | |||
| |||
In the immersive browser, click Excitations
 , right-click in the Excitations title bar, and select New Track.
The Track: Anchor Positioning dialog box appears.

Click Next in the Track: Anchor Positioning dialog box.
- A compass attaches itself to the part you selected (if you have selected multiple parts, the compass is attached to the first part selected).
- The following elements appear:
- The Track Authoring balloon
- The Simulation Player
- The Track: Track Authoring dialog box appears.
Click Generate Track
 .
.The Generate Track dialog box appears.
If enabled, deselect Resource Selection
 .
.Resource Selection
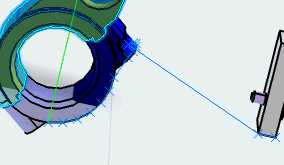
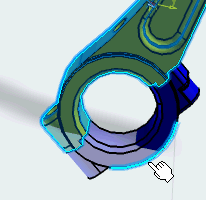
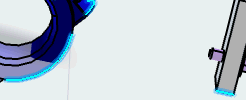
enables you to select an entire product when you click on a part of it. For this task, you want to be able to select geometric features.Select a line or edge from the 3D part data.
Modify the parameters.
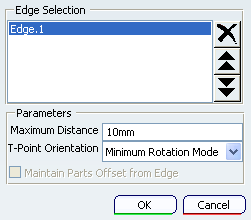
- Shorten the Maximum Distance between the trajectory points that are generated by Generate Track .
- Select the optimal orientation for the generated trajectory points from the T-Point Orientation list. The choices are Maximum Rotation Mode, Fixed Orientation Mode, and Surface Normal Mode.
- If you want to create the track at an offset from the edge, select the Maintain Parts Offset from Edge check box.
- Shorten the Maximum Distance between the trajectory points that are generated by Generate Track
Select additional edges.
The edges do not to have to be continuous. When you select edges that are not continuous, the track segments are interpolated from the edges.
As you select edges, the dialog box shows what you have added. The appear (and are numbered) in the order in which you select them. The order of the edges in the dialog box determines the order of trajectory points in the track.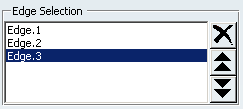
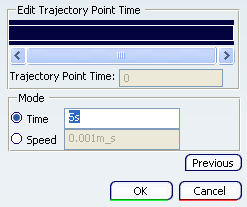
Once the track has been generated, each trajectory point can modified as if it had been created manually. You can add other trajectory points to the track using other methods.