Using Macros with VSTA | ||
| ||
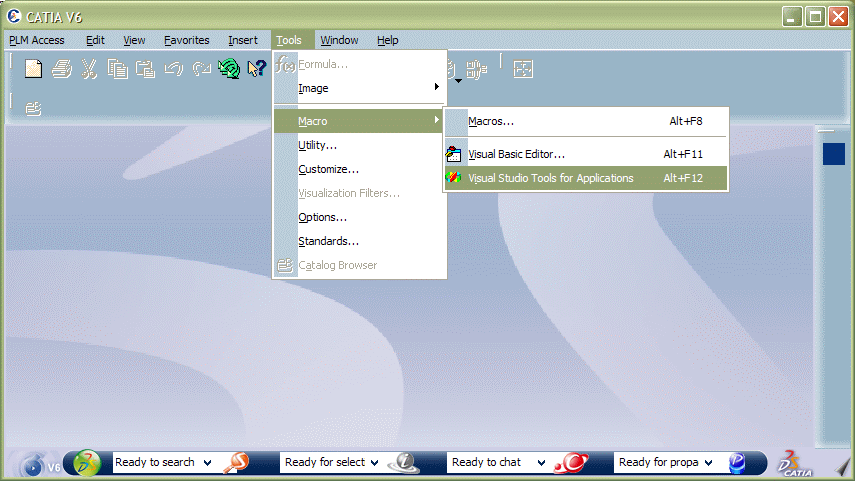
Accessing VSTA IDE from Tools > Macro... Menu
This task shows how to access the VSTA IDE tools.
- Select the Tools > Macro > Visual Studio Tools
for Applications... command to display the VSTA IDE user interface:
If you have not created or opened a VSTA macro library before, the Macros GUI will prompt you to do so.
![]()
Creating a New VSTA Project
This tasks explains how to create a new VSTA project.
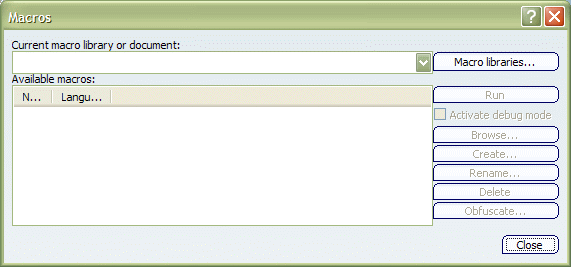
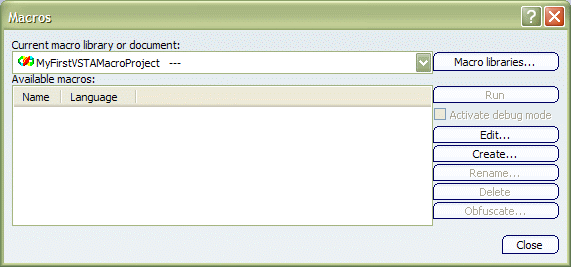
Select the Tools > Macro > Macros... command to display the Macros dialog box:
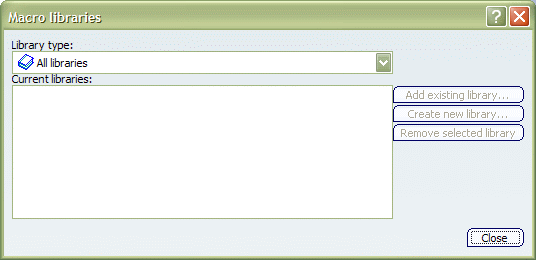
Click the Macro Libraries... button to display the Macro Libraries... dialog box:
Select PLM VSTA projects as the Library type then click the Create new library... button:
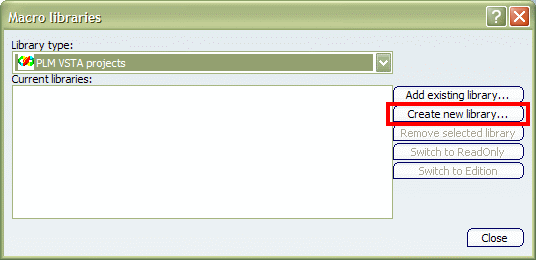
to display the New VSTA project dialog box:
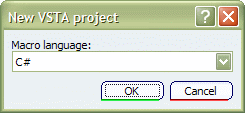
Name the project in the following dialog box:
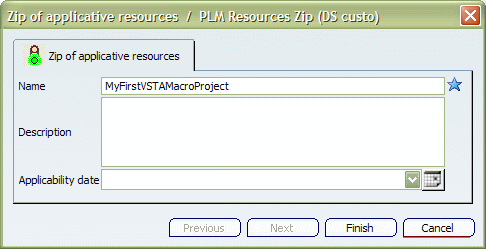
then click the Finish button.
A progress bar appears while the new project is created in the ENOVIA V6 database.
In the the Macro Libraries... dialog box:
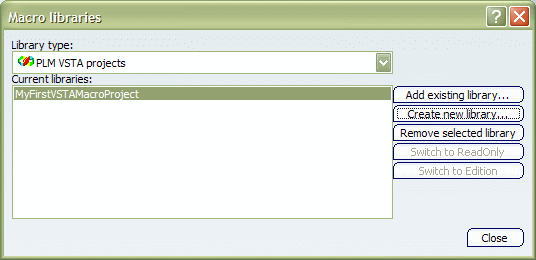
click the Close button.
Clicking the Close button loads the project into the VSTA IDE environment. This will take a few seconds.
![]()
Opening an Existing VSTA Project
This task explains how to open an existing VSTA project.
Select the Tools > Macro > Macros... command to display the Macros dialog box:
Click the Macro Libraries... button to display the Macro Libraries... dialog box:
Select PLM VSTA projects as the Library type then click the Add existing library... button:
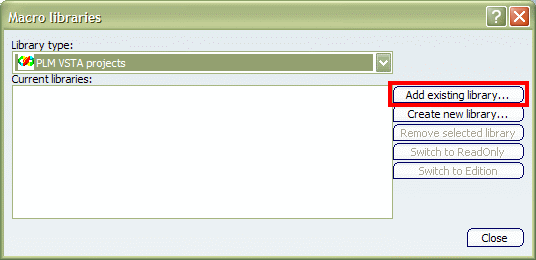
to display the Macro Library Chooser dialog box:
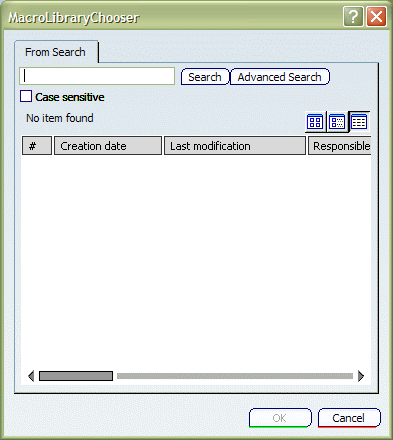
Enter * in the search field and click the Search button to display the projects saved in the database:
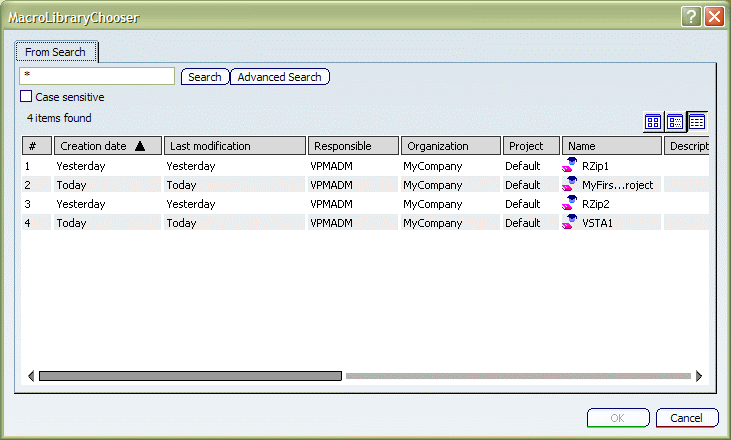
Select the project:
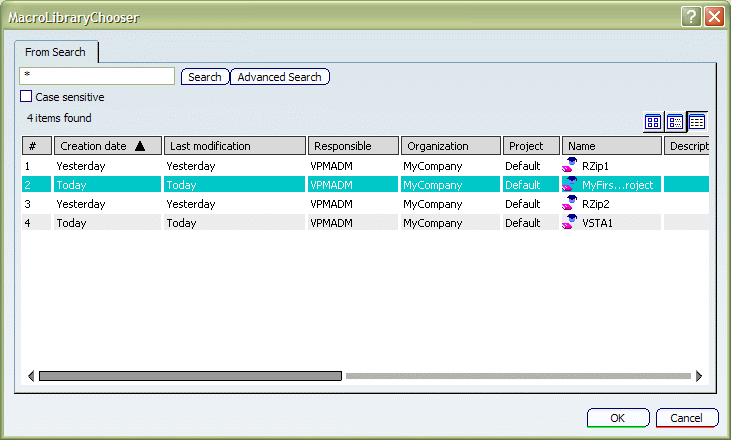
then click OK to display the Macro Libraries... dialog box:
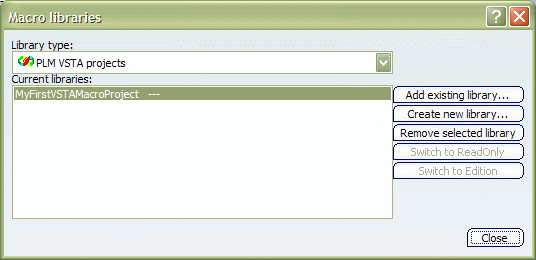
Note that the Remove selected library button deletes the macro library from the current session, but does NOT delete it from the database.
Click the Close button to load the project into your current session:
![]()
Creating, Editing, Renaming and Deleting Macros in a VSTA Project
This task explains how to create, edit, rename and delete macros in a VSTA project.
With the current macro library selected:
click the Create... button to display the Create a new macro dialog box:
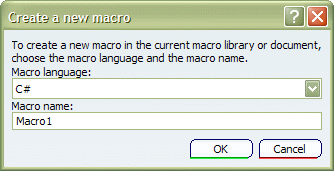
Select the Macro language and the Macro name.
The Macro name must begin with the string "Macro". Any attempt to assign a different name will produce an error.
Click the OK button.
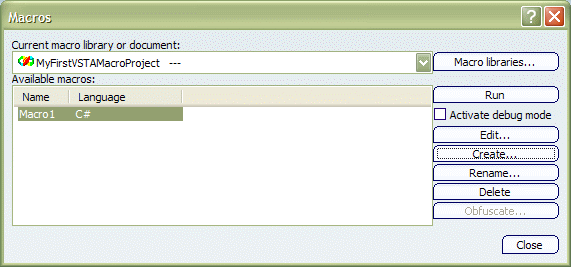
The macro name is displayed in the Macros dialog box:
To edit the macro, click the Edit... button to open the VSTA IDE editor:
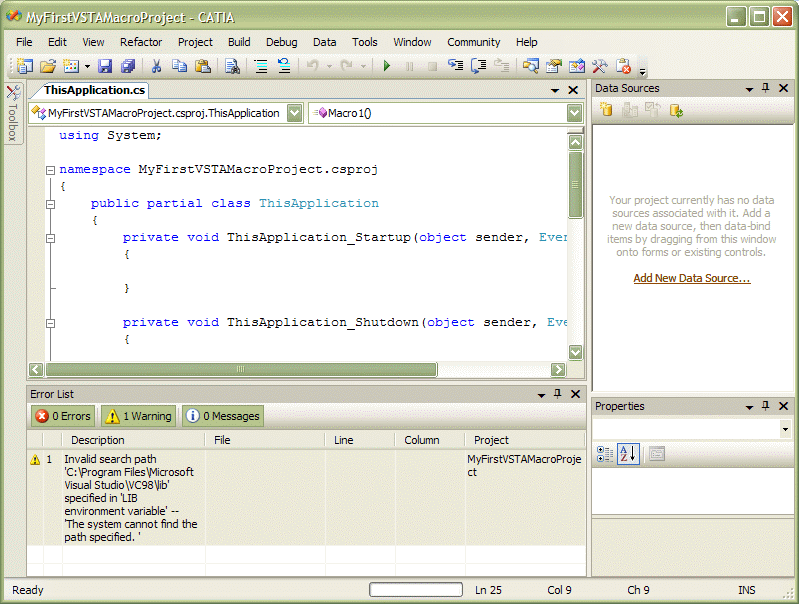
Check the Activate debug mode check button to run the editor debug mode allowing you, for example, to place breakpoints.
To delete the macro, select the macro and click the Delete... button:
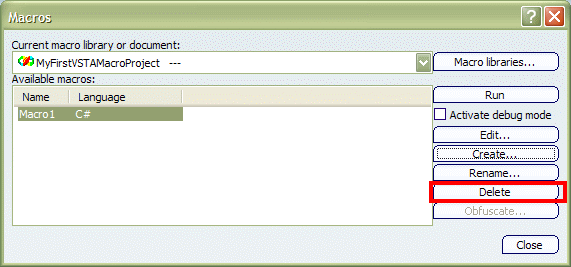
To rename the macro, select the macro and click the Rename... button:
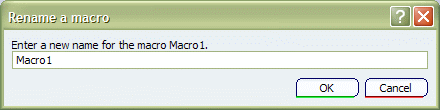
Rename the macro and click OK.
The Macro name must begin with the string "Macro". Any attempt to assign a different name will produce an error.
![]()
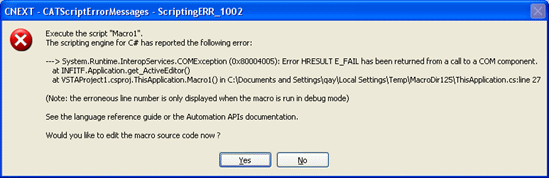
Solving Buildtime and Runtime Errors
This task explains how to solve buildtime and runtime errors.
The following tutorial will show you how to simulate and solve buildtime and runtime errors, that you are likely to face when developing VSTA macros.
Go back to CATIA, re-open the Macros GUI, you get the following error:

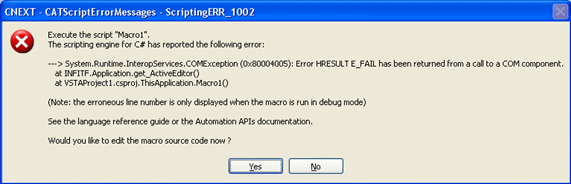
If you go back to CATIA, and re-open the Macros GUI, Macro1 is displayed. Run it. You get the following error:
Edit the macro, add a breakpoint (F9) on the faulty source line:

Go back to CATIA, check the Activate debug mode check button, and run the macro. The VSTA IDE should stop on your breakpoint and display the source code:

Check that you can watch some variables, as when debugging inside Visual Studio. Next press F8 to execute the faulty line. You will get a message box in CATIA (note that the error line is now displayed):