Snapping the Robot to Selected Objects Automatically

An alternative to dragging and dropping the Robot onto an object is to snap the Robot to the object of your choice. Whenever the Robot is translated or rotated, the selected object is moved accordingly.


Before you begin: The Robot is automatically snapped only onto non-constrained objects recognized by the Robot.
Related Topics
Selecting Objects
  1. Open any document with geometrical data.

  2. Right-click the Robot then select Snap automatically to selected object.

  3. Select an object (either in the geometry area or in the specification tree).

    The Robot is automatically snapped onto the selected object:
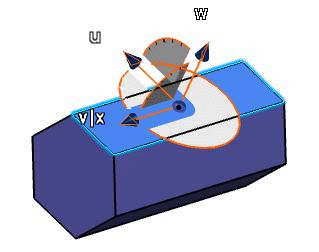
    The Robot keeps its current alignment because it is snapped to the position of the selected object's axis.

    If you select a flexible sub-assembly in the specification tree then:


    • The selection of the flexible sub-assembly node in the specification tree is authorized.
    • The Robot is positioned on the first rigid child in the specification tree.
    • All rigid children of the flexible sub-assembly are selected so that any further manipulation with the Robot moves rigid children relative to the flexible sub-assembly. This means that the flexible sub-assembly itself is not moved by the Robot but only its children.
    Tip:
    • As the position of the selected object always depends on the active object or on the absolute axis (reference's coordinates), it is recommended to set the root object as active if you want to snap child objects under it.
    • If a new axis system has been created, selecting it in the geometry area or in the specification tree makes the Robot disappear. To make it re-appear, simply select any other element in the geometry or in the tree.

    As long as Snap automatically to selected object remains activated, the Robot is snapped automatically.

  4. Right-click the Robot then clear Snap automatically to selected object to deactivate the command.