Setting Depth Effects | ||
| ||
Select . (In VPM Digital Review, you can also click
 .)
.)
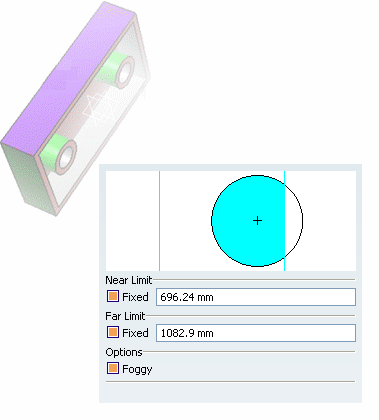
The blue sphere completely encompasses the objects in your product. The white cross represents the center of the objects in the geometry area.
The color of the area behind the blue sphere is the background color of your document.
The vertical lines represent the front (near) and back (far) clipping planes. By default, depth effects are deactivated: if you zoom in and out, you will see that for the moment the geometry is not clipped.
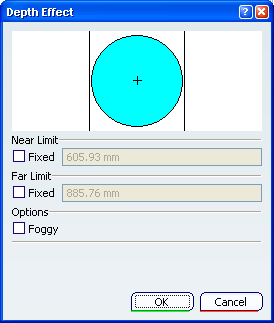
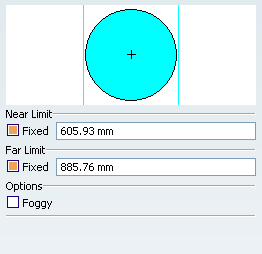
Tip: You can keep the Depth Effect dialog box open and continue working with other commands. You will be able to understand the results obtained by setting depth effects by zooming in and out. In the Depth Effect dialog box, set the Near Limit and Far Limit by selecting the Fixed check box for each option, entering values and pressing Enter in each case.
The color of the vertical lines representing the clipping planes has changed:
You can also drag the vertical lines representing the near and far clipping planes to produce the same effect:
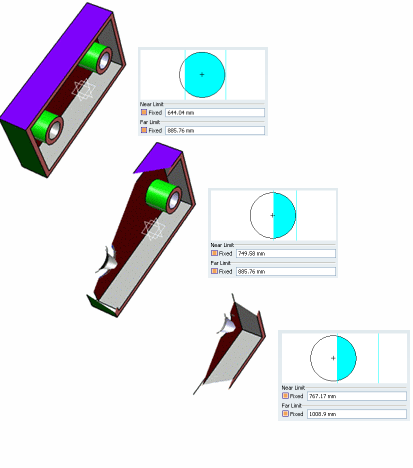
The back (far) section of the geometry is clipped. You now only see what is located between the near and far clipping planes.
Important: The Near Limit and Far Limit values can change even when they are not activated because they are dependent on the global bounding box of the 3D object. Whenever the size of the bounding box exceeds the Near or Far Limit, the values are adjusted accordingly. Select the Foggy check box.
The foggy option introduces a foggy effect:
Zoom out again.
As you zoom out, the fog effect is increased. The fog gets thicker as you continue to zoom out beyond the back clipping plane: