Adding and Naming Layers | ||
| ||
In the Graphic Properties toolbar, click the arrow on the Layer list, then select Other Layers... from the list.
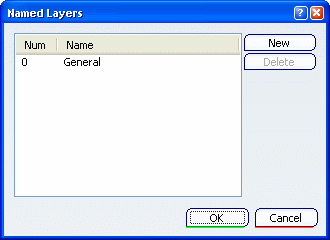
In the Named Layers dialog box, click New.
The layer 1 is added to the list, and the name Layer 1 is automatically assigned:
Click OK.
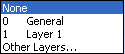
The layer you just added (Layer 1) is now the current layer, and it is displayed in the Layer list like this:

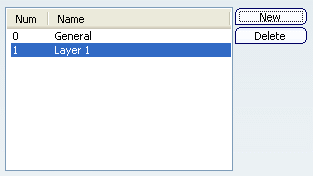
The list of layers in the Layer list now looks like this:
If you select an object before creating the new layer, it will be transferred automatically to the new layer created.
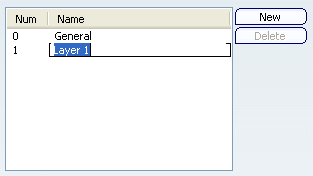
Optional: To rename a layer when creating it, after clicking the New button, slowly click twice the line containing the layer name to make the box editable:
If necessary, you can edit the layer number. This enables you to set up named layers to comply with your company's layer conventions.
Then, enter the new name and click anywhere outside the editable box to confirm the name.
Important: Delete lets you remove the name of the layer you selected from the list (except if this is the name of the current layer). Clicking Delete does not delete the layer itself since a layer cannot be removed. However, naming a layer is totally independent from assigning objects to it. As a consequence, you can edit or remove the layer name without impacting the geometry. Visualization filters referencing this layer will still be valid as well as any objects you may have assigned to it.