Previewing Images in the Album

You can display images in the Album after they have been captured and perform viewing operations using your mouse.


Before you begin:

Only the following objects can be browsed in the Album:

  • Raster files
  • Video files
  • Vector files in CGM, PS, HPGL, HPGL2 or CGM format.

  1. Select Tools > Image > Album....

    The system automatically assigns names to each image. Images are named "Capture_xxx", where "xxx" is a number from 001 to 999.

    For each captured image, the name, class (Raster, Vector 2D, etc.) and type (TIFF, BMP, AVI, MPEG, SVG, etc.) are displayed.
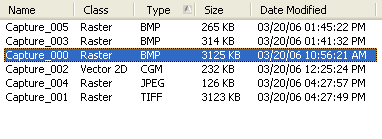


    Tip:
    • To sort images by class or type, click the corresponding column title.
    • Use the file tree to the left to navigate to the folder containing images you want to view in the Album.

  2. Optional: Select Details in the View Mode list.

    More information about the captured images is displayed.

  3. Select an image in the list.

    The image is displayed in the preview area in the bottom part of the dialog box and its storage folder is displayed in the Path box at the top of the dialog box.

    Important: You can perform the following viewing operations using your mouse:
    • Center the display at a specific location by clicking the middle mouse button.
    • Pan by dragging using the middle mouse button.
    • Zoom by pressing and holding down the middle mouse button, then clicking the left (or right) mouse button and dragging (still holding the middle mouse button down).

  4. Optional: Click to access the images stored in the default folder.

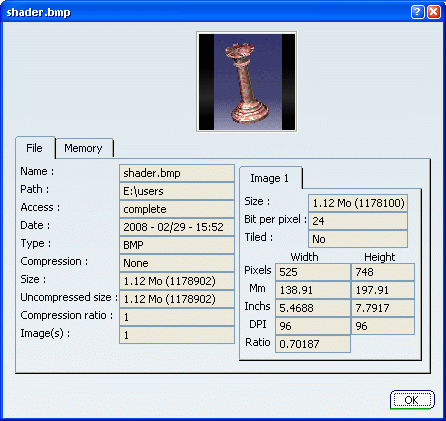
  5. Right-click a raster image then select Properties.

    The image information window provides information on the selected pixel image (name, path, creation date and time, etc.) under the File tab:

    Il also provides memory information (memory size, pixel format, pixel width and height, etc.) under the Memory tab:


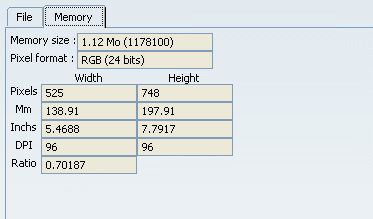
    The look of the information window varies according to the image format you selected.

  6. Click OK to close the information window and go back to the Album contents.

  7. Right-click an image from the list and select Preview or double-click the image name in the list.


  8. Select OK to exit the Print Preview window.

  9. Select several images in the list.

    Note that you can perform multiple selections by holding down Ctrl then clicking, holding down Shift then clicking or dragging using the left mouse button.

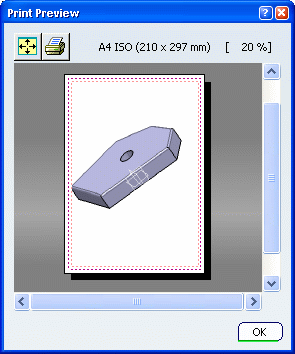
  10. Right-click then select Preview.

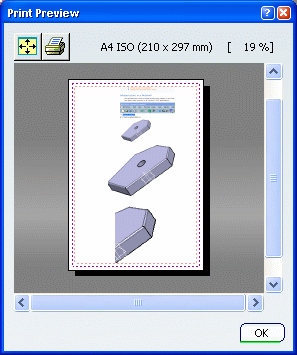
    All the selected images are now displayed together in the Print Preview window:

    Important:
    • Performance and image quality is determined by the number of images on the preview page.
    • You can visualize the images using Fit All In or perform viewing operations.

  11. Optional: Right-click the image of your choice then use the contextual commands available. You can:

    • copy the image
    • edit the image
    • rename the image
    • erase the image
    • print the image
    • replay your video.

    Keep in mind that depending on the image format you select, some contextual commands might be grayed out.